


Alvar 61″ Oak 6-Drawer Chest(Set of 2)


Alvar Arched 61" Oak Sideboard with Drawers(Set of 2)

Alvar Arched 91″ Oak Modular Media Console(Set of 3)


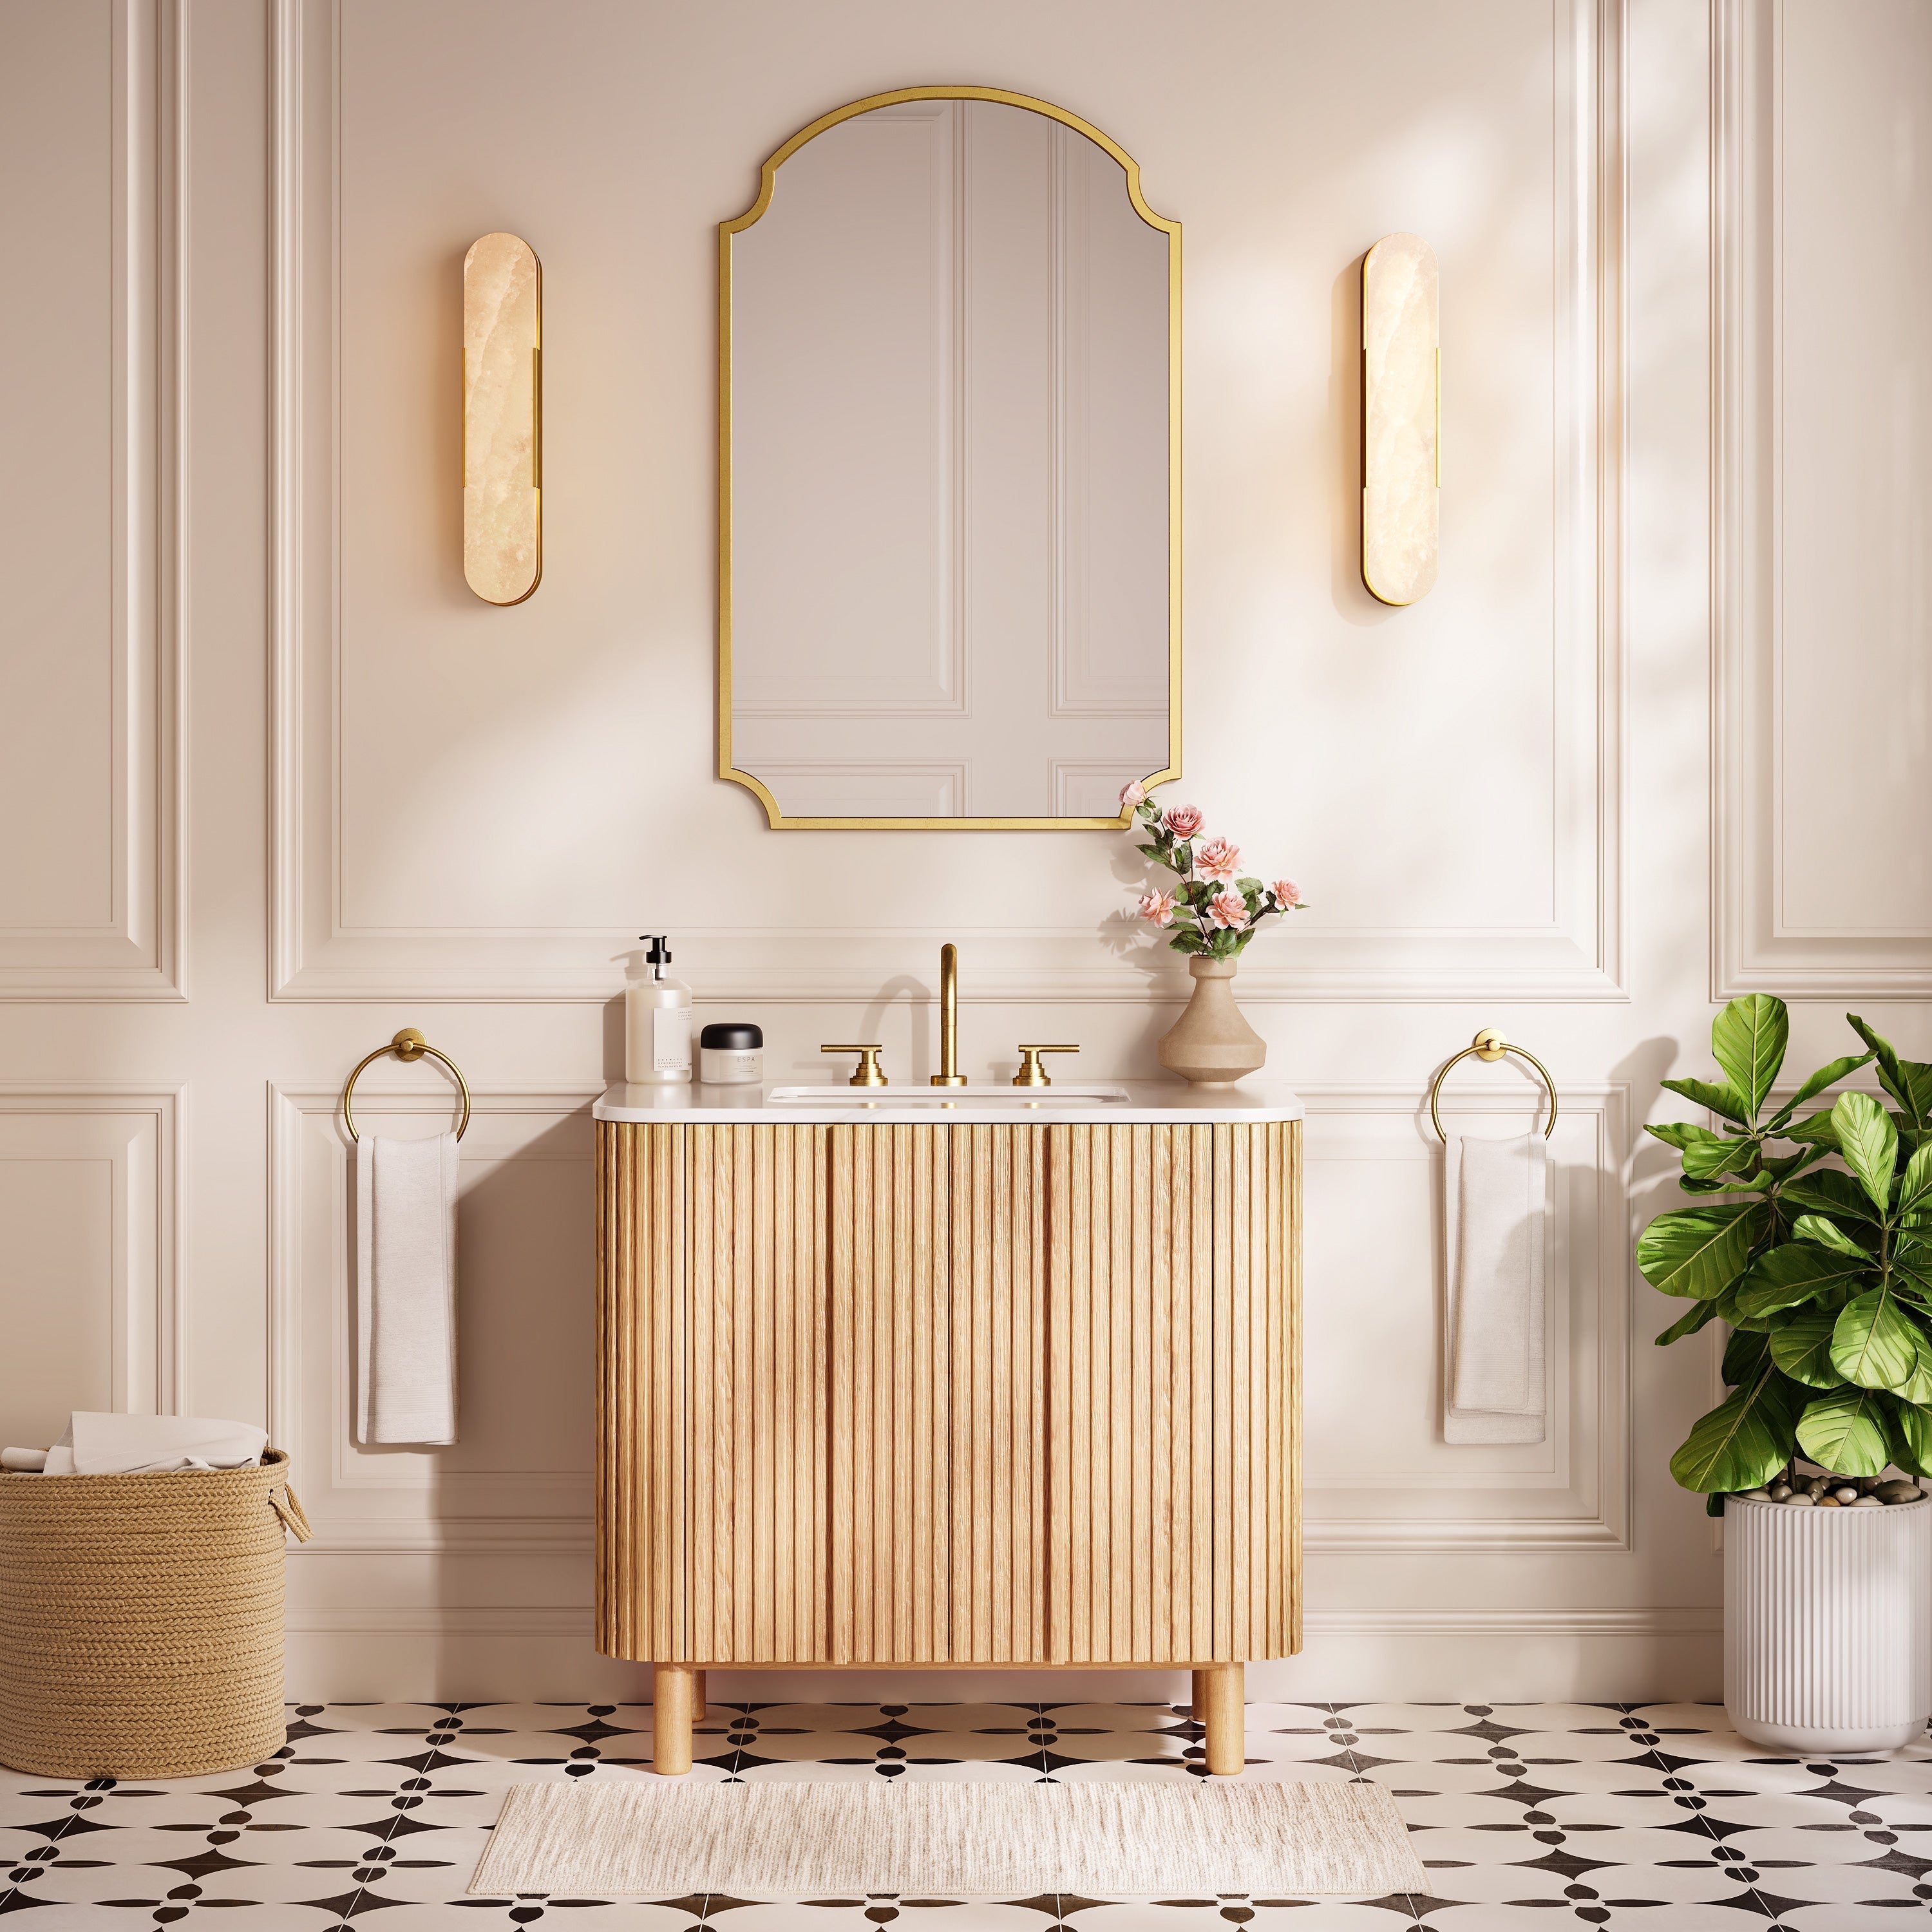
Charlie Sintered Stone Nightstand 26" W


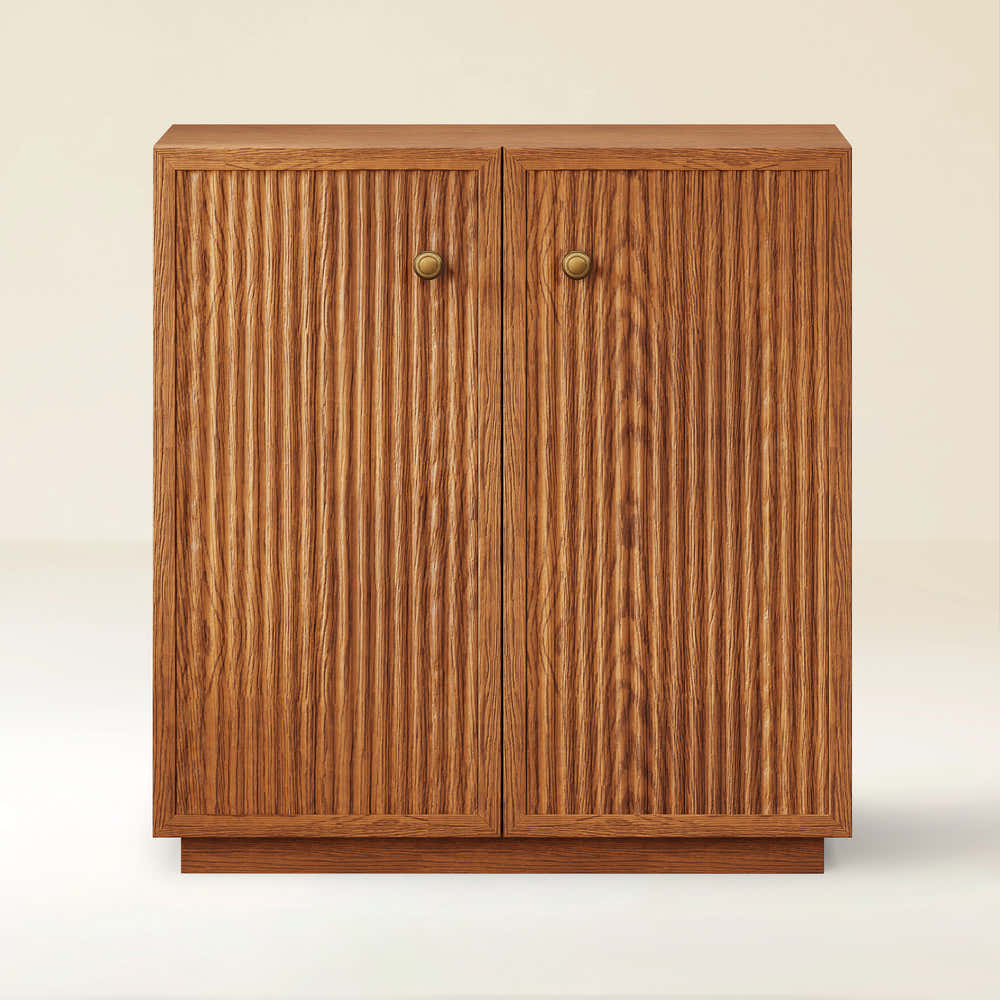
Ewan 63" Oak Slatted Sideboard Buffet Cabinet

Ewan Sintered Stone Nightstand 26"W

Holt 63″ Solid Oak Console(Set of 2)

Holt 95″ Solid Oak Console(Set of 3)

Isla Oak Sintered Stone Rectangle Coffee Table 120cm

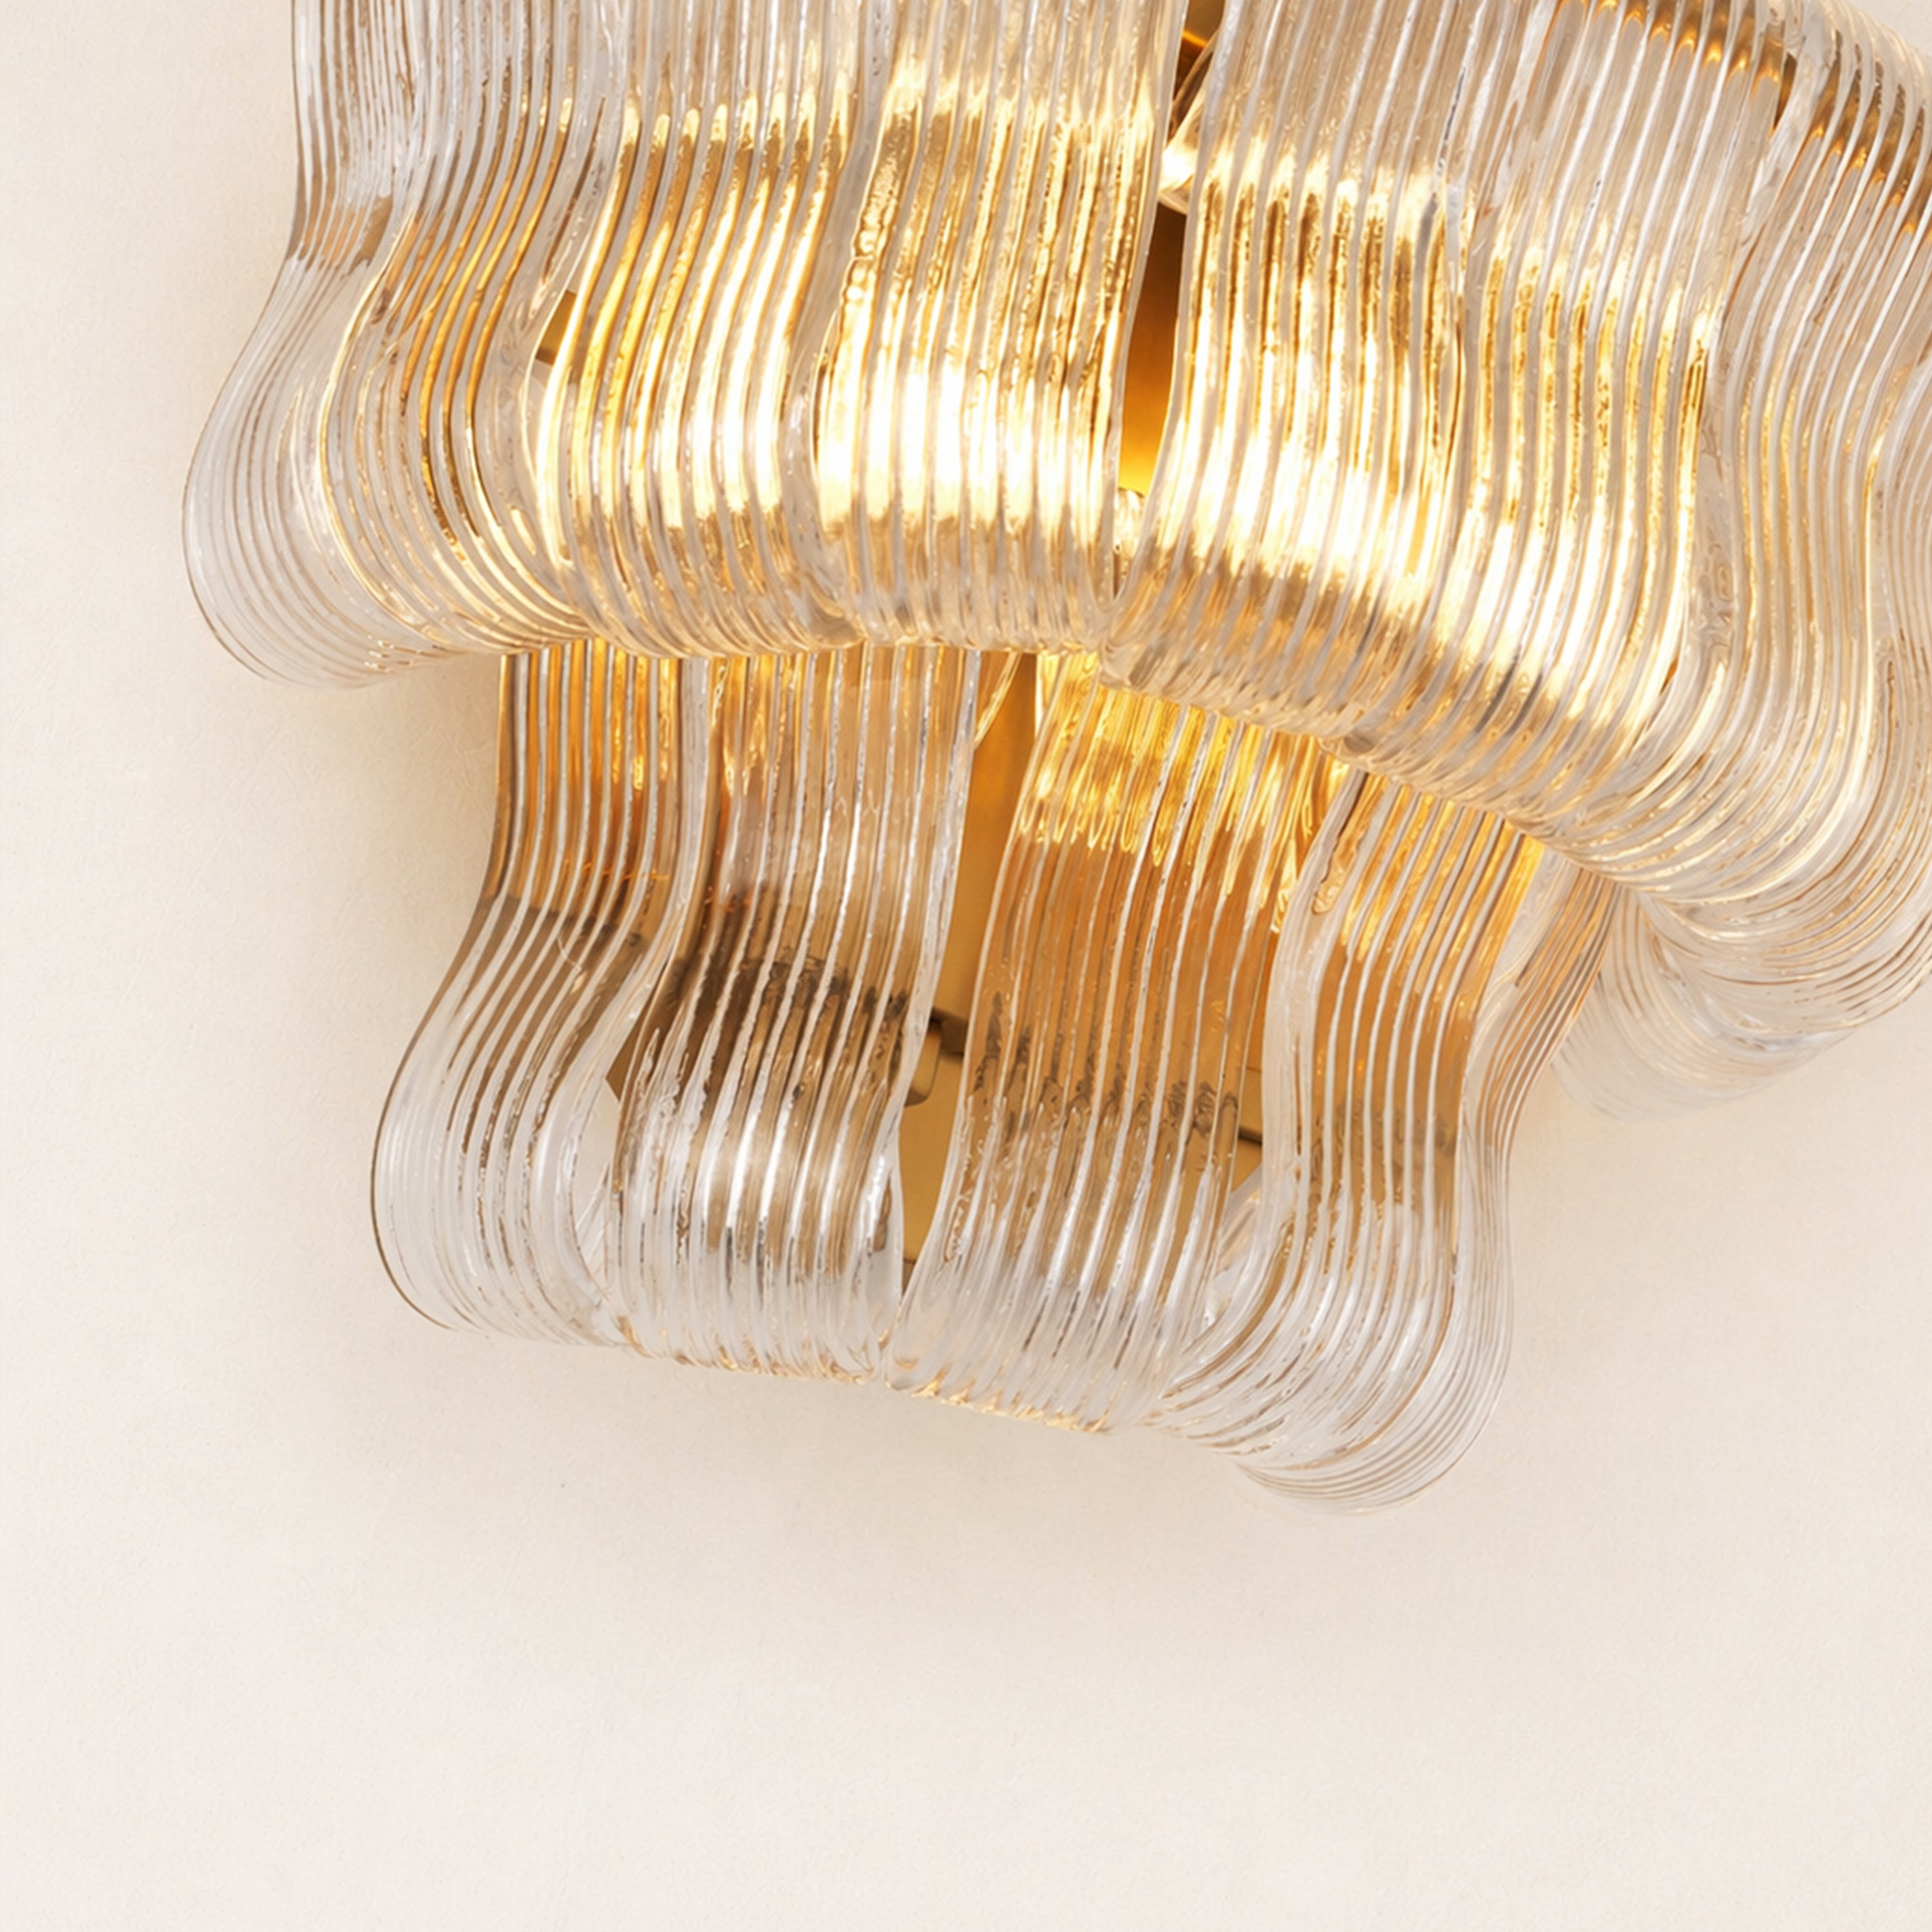
Moira Alabaster Round Chandelier 61cm D


Silas Extendable TV Stand 203cm to 280cm


Alvar Arched 91″ Oak Media Console(Set of 3)

Ewan Oak Extendable Media Console 79" to 110"

Holt 126″ Solid Oak Console(Set of 4)

FSC FCOC47059 . FSC is dedicated to the promotion of responsible forest management
worldwide. By selecting this product, you help take care of the woorld's forests

UL-certified for indoor drying environments not directly exposed to excessive moisture or water;
Use in the United States and Canada.

Certified to Dry ETL electrical standard: suitable for use indoors in dry locations not directly exposed to excessive moisture and water
Use in the United States

CE-certified drying equipment compliant with electrical standards: Suitable for indoor drying environments not directly exposed to excessive moisture or water;
Tested for use in Europe, the UK, and other regions.


The support center has answers to questions you may have. You can also contact customer service in the support center if you can't find what you're looking for.
Support Center >
At houlte, we are committed to delivering quality, style, and great value to our customers. Our goal is to simplify your shopping experience by providing competitive prices and exceptional service.

If an item you purchased from houlte goes on sale on our website within 30 days of your purchase date, you may request a price match. This policy ensures you always receive the best value when shopping with us.
Houlte reserves the right to interpret and adjust the terms of the Price Match Policy as necessary.
Houlte has partnered with Taskrabbit to make your everyday life at home easier by connecting you with flexible and affordable ways to get your to-do’s done including furniture assembly and mounting.

1. Purchase your furniture at Houlte.
2. Check your order Dispatched and Delivered email and click the
Houlte link. You will be redirected to Taskrabbit's landing page.
3. Post your task on Taskrabbit platform.
4. Pick the best tasker to assemble your furniture.
Houlte has partnered with Taskrabbit to make your everyday life at home easier by connecting you with flexible and affordable ways to get your to-do’s done including furniture assembly and mounting.
Taskrabbit Assembly is available in most metro areas in the US. The availability of Taskers varies based on demand. When placing an order on Taskrabbit, you will need to enter your zip code. If the service is not supported in your area, you will not be able to place an order.
You can book assembly for your Houlte furniture as early as the next day after your delivery, and up to 14 days in advance, giving you flexibility to choose a time that works best for you.

Ready to use out of the box; minimal installation may be required (e.g., handles).

Main structure is pre-built; minor components require attachment (e.g., legs).

Assembly required; multiple parts must be assembled before use.
Our furniture is built with a combination of core boards, real wood veneers, and selected solid wood parts. Each material is used for a different purpose—structure, surface appearance, or visible strength—so the final piece feels balanced in performance, finish, and cost.
Core boards form the internal foundation of the furniture. They provide structure, stability, and efficiency across large surfaces and cabinet bodies.

Stable structural board

Smooth and consistent

Functional internal board
Selected solid wood parts are used where visible strength, tactile quality, and structural integrity matter most—such as legs, frames, trim, and exposed support details.

Durable and classic

Light and versatile

Premium and elevated
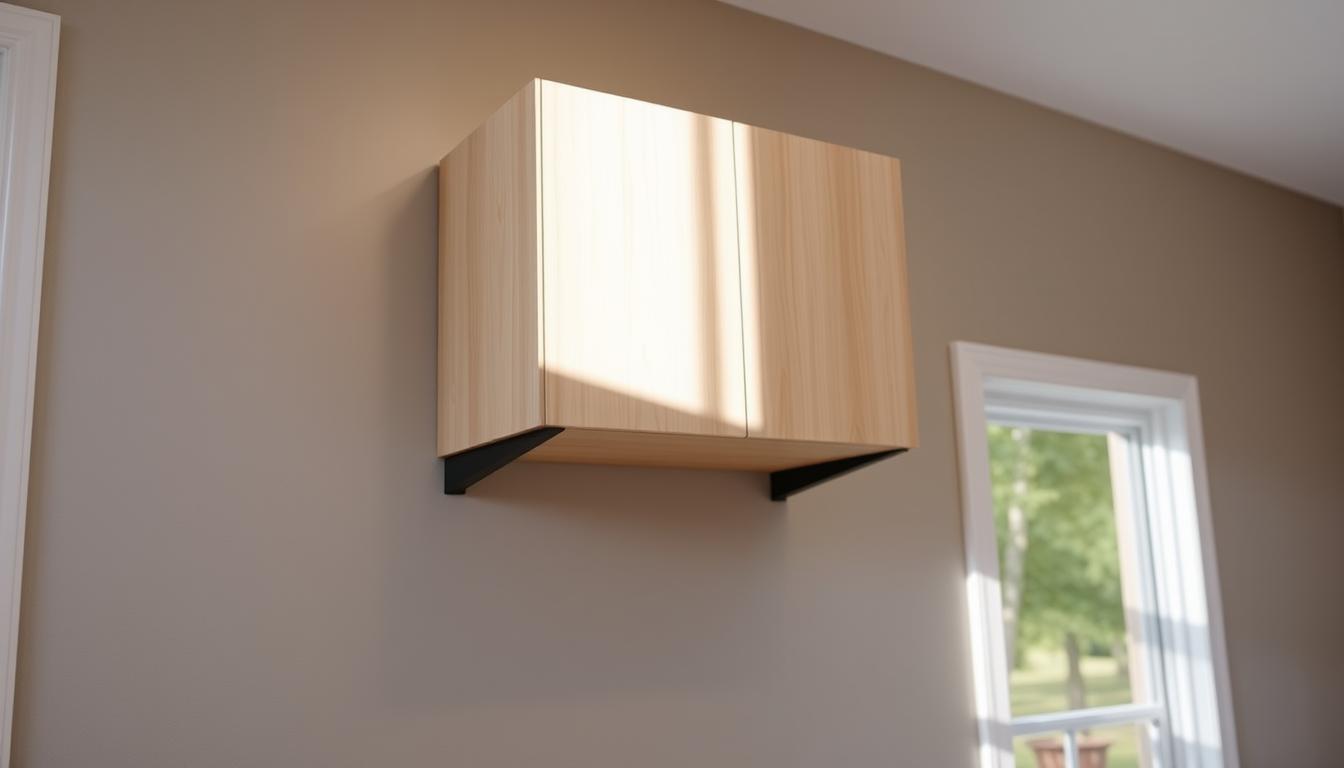
Installing kitchen or bathroom cabinets can be tough when studs don't match your spot. Many homeowners struggle with this during renovations. But, wall cabinet mounting is possible with special hardware and techniques.
Old methods need wood framing for support. Yet, modern drywall anchors and systems work well as alternatives. They spread the weight over a bigger area of the wall.

This guide shows you how to mount without studs. You'll learn about toggle bolts, French cleats, and advanced anchors. Each method works for different cabinet weights and wall types.
Always keep safety first when mounting. Using the right hardware and spreading the weight ensures your cabinets stay put for a long time. Follow these steps to get great results in any room.
Modern drywall systems affect how well you can mount cabinets. Residential drywall is made of gypsum board between paper layers. It's usually 1/2 inch to 5/8 inch thick.
Homes often have drywall over wooden or metal studs, 16 or 24 inches apart. The problem with hollow wall mounting is that drywall can't hold much weight. Without the right anchors, even light cabinets can pull away.
When mounting cabinets without studs, spreading weight evenly is key. This prevents damage to the drywall. Experts know how to handle the lack of solid wood backing.
"The key to successful cabinet mounting lies in understanding that drywall is a finishing material, not a structural support system."
Different drywall thicknesses affect how well anchors work. Thicker drywall gives more grip, while thinner walls need special anchors.
The space behind drywall adds to the mounting challenge. Regular screws can't handle the load. So, you need special anchors that expand or spread the weight.
Professional installers know several important factors. Wall age, moisture, and repairs all matter. Newer drywall usually holds better than older, damaged surfaces.
Knowing about drywall helps homeowners choose the right hardware and methods. The aim is to create a strong mounting system, even with drywall's limits.
The right tools and hardware are key to a successful cabinet installation. You need the right equipment for your wall type and cabinet weight. Knowing what hardware works best ensures your cabinet stays stable and safe.
Start by getting all the materials you need before you begin. This way, you avoid delays and have a backup plan if needed.
Heavy-duty wall anchors are crucial for a strong installation. Toggle bolts are the best for holding power, thanks to their spring-loaded wings. They support cabinets over 50 pounds per point.
Snap toggle systems are easier to use but still hold well. They snap into drywall for a secure mount without the hassle of traditional bolts.
Molly bolts are good for lighter cabinets. They expand to hold moderate weight. Metal expansion anchors are useful for certain wall thicknesses.
A good drill with variable speed is essential for making holes without damage. You'll need drill bits from 1/8 inch to 1/2 inch for different anchors. Masonry bits are needed for concrete or brick.
Measuring tools keep your installation accurate. A 25-foot tape measure is great for spacing, and a 4-foot level ensures alignment. Stud finders help find where not to drill.
For marking, use pencils for layouts and awls for pilot holes. A center punch helps drill bits start straight, avoiding wandering on smooth surfaces.
Wearing safety gear is crucial to avoid injuries. Safety glasses protect your eyes from dust and shavings. Choose wraparound styles for full coverage.
Dust masks keep you from breathing in particles, which is vital when drilling. N95-rated masks are good for drywall work.
Work gloves protect your hands from sharp edges and surfaces. Pick gloves that let you handle small parts like screws and anchors. Knee pads help when working on the floor.
Heavy duty anchors come in different types, each for specific uses. Choosing the right one is key for a safe cabinet installation. Knowing the strengths and limits of each anchor ensures a reliable mount.
Installers often use four main types of anchors for cabinet mounting. Each has its own benefits in holding power, ease of use, and durability. It's important to match the anchor to your project's needs.
Toggle bolts have the highest holding power among all options. They can hold up to 75 pounds per anchor in standard drywall. The toggle spreads the load wide behind the wall.
To install, you need to drill a big hole for the toggle wings. Once in, the wings open wide and can't be taken out without losing the hardware. This makes toggle bolts great for cabinets that won't be moved often.
Molly bolts are good for medium-weight and can be removed. They expand behind the drywall for a strong hold. Most can support 25-50 pounds, depending on size and wall thickness.
The removable screw lets you adjust cabinets without losing the anchor. This makes molly bolts good for installations that might need changes later. The anchor sleeve stays in the wall even when the screw is out.
Snap toggle systems are easy to use and reliable. They have a plastic toggle that snaps into place. The screw can be removed and put back many times without losing hold.
They only need a small pilot hole, making them less invasive than toggle bolts. Snap toggles support 30-60 pounds per anchor and work with different drywall thicknesses. Their design makes mounting and adjusting cabinets easier.
Metal expansion anchors are best for solid masonry or concrete block. They expand against solid material for a strong hold. But, they're not recommended for hollow wall installations.
In drywall over masonry, metal anchors offer great holding power. Yet, most homes have hollow drywall, where other anchors work better. Always check your wall type before choosing expansion anchors.
Getting your cabinet installed right starts with checking your wall and what you need to mount it. This step is key to picking the right support systems for your space. Doing it right means your cabinets will stay put and last a long time.
Experts always do a deep check before they start mounting anything. This way, they save time, money, and avoid safety risks. They look at three main things that affect how well your cabinets will be installed.

First, you need to know what your walls are made of. Most homes have drywall over wood or metal, but not all. Some walls might have plaster, concrete, or even more drywall.
Use a stud finder to see how thick your walls are and what's inside. Drywall is usually 1/2 inch thick, but sometimes it's 5/8 inch. Thicker walls can hold anchors better for your cabinets.
Make sure there's no wiring or pipes where you want to mount. A non-contact voltage tester can check for live wires safely. Mark any obstacles on your plan to avoid damage when you drill.
Knowing the weight of your cabinet is crucial. Start by weighing it empty. This is your base weight for all calculations.
Then, figure out how much it will weigh when it's full. Kitchen cabinets usually hold 35-50 pounds of stuff. Bathroom cabinets carry 15-25 pounds of things like toiletries.
Installers suggest planning for 150% of the expected weight. This extra weight helps with temporary loads and makes your cabinets reliable for a long time. Here's how to do it:
Getting your measurements right is key to a smooth install. Start by measuring your cabinet and making a paper template. This helps you see where it will go and spot any problems.
Use a level to draw straight lines on your wall. Mark the top and bottom of where the cabinet will go with a pencil. Double-check your measurements before you start drilling.
Here's how to mark where to put your anchors:
Professional cabinet installation needs careful planning. Spending time on assessment and measurement avoids problems later. Your hard work ensures your cabinets will be stable and reliable for years.
Toggle bolts are great for cabinet mounting brackets in hollow walls. They hold up to 150 pounds when installed right. The four-step process makes sure your cabinet is securely attached.
First, place the cabinet against the wall where you want it. Use a level to make sure it's straight. Then, mark where to put the anchors with a pencil.
Measure the space between the mounting holes on the cabinet. Move these measurements to the wall with a tape measure. Check your measurements twice to avoid mistakes.
Choose the right drill bit size for your toggle bolts. Holes should be 1/2 inch to 5/8 inch in diameter. Use a sharp bit for clean holes.
Drill straight through the drywall at each mark. Make sure the drill is straight up and down. Clean out the holes with a vacuum or air.
Put the toggle bolt through the cabinet bracket before you install it. Push the folded wings through the holes until they open behind the drywall. You'll hear a click when they're in place.
Pull the bolt gently to make sure the wings are against the drywall. This is key for strong drywall installation.
Put the cabinet against the wall, lining up the brackets with the toggle bolts. Start tightening the bolts slowly, one side at a time. This keeps the cabinet steady.
Tighten each bolt until it's snug, but don't overdo it. Use a level to keep the cabinet straight. Check the installation by applying some pressure before adding items.
Molly bolts are great for hanging medium-weight cabinets. They provide strong wall reinforcement without needing to find studs. This makes them perfect for drywall, where other anchors might not work well.
These anchors can hold up to 50 pounds each when installed right. They expand behind the drywall for a solid hold. This is great for lighter cabinets and bathroom storage.
Start by drilling holes that match the anchor size. Most molly bolts need 3/8-inch or 1/2-inch holes. Push the anchor all the way in until it's flush with the wall.
Then, use a screwdriver or a molly bolt tool to tighten the screw. This expands the anchor against the wall. Keep tightening until you feel it stop, which means it's set right.
The key to successful molly bolt installation is achieving the right balance between secure expansion and avoiding over-tightening that could damage the drywall.
After it's set, remove the screw. This leaves the anchor in the wall. Your cabinet screws will go into these anchors when you install your cabinet.
Spacing molly bolts correctly is key for wall reinforcement. Place them at least 6 inches apart to avoid wall stress. For standard cabinets, use four to six anchors based on the cabinet's size and weight.
Figure out your spacing by dividing the cabinet's width by the number of anchors minus one. This spreads the weight evenly. Don't put anchors closer than 3 inches from edges or corners.
| Cabinet Weight | Recommended Anchors | Spacing Distance | Safety Margin |
|---|---|---|---|
| 15-25 lbs | 4 anchors | 8-12 inches | 2:1 ratio |
| 25-35 lbs | 5 anchors | 6-10 inches | 2:1 ratio |
| 35-50 lbs | 6 anchors | 5-8 inches | 1.5:1 ratio |
| Over 50 lbs | Additional support | 4-6 inches | Consider alternatives |
To get the right tension on molly bolts, listen for expansion feedback. Turn the screw clockwise until it grabs the wall. Keep going with quarter-turns until it feels tight.
Test each anchor by gently pulling on the screw. If it doesn't move, it's set right. If it's loose, remove it and try a bigger size or a different spot.
Molly bolts are great because they're adjustable. You can loosen and retighten them many times without losing strength. This is perfect for cabinets that might need to be moved or removed later.
French cleat mounting is great for heavy cabinets over 100 pounds. It spreads the weight along a rail, not just on anchors. This design makes it easy to move the cabinet when needed.
This method is better than others when studs are hard to find. It avoids stress points that can cause anchors to fail. Pros love it for its reliability and lasting performance.
To make a French cleat, cut beveled strips with care. Use 3/4-inch plywood or solid wood for strength. The bevels must fit together perfectly.
Set your table saw to 45 degrees for accurate cuts. Cut two strips with opposite bevels. Sand the edges to ensure a smooth fit.
Test the cleats before installing. The male cleat should fit into the female cleat smoothly. A little sanding can make it perfect.
Mount the wall cleat with heavy-duty anchors. Use toggle or molly bolts. Space anchors every 16 to 24 inches.
Make sure the wall cleat is level. Use a level to check and adjust. A slight tilt can cause problems.
Mark anchor spots carefully and drill pilot holes. Tighten anchors slowly while checking level. This method avoids damaging the cleat.
Place the cabinet cleat on the back with care. It must be level and align with the wall cleat. Mark screw spots before drilling.
Use wood screws that go at least 1 inch into the cabinet. Countersink them slightly. Check the cleat's alignment before installing.
This method works well with uneven walls. The French cleat system ensures stability for heavy cabinets.
Every cabinet installation starts with knowing the load and planning for safety. It's crucial to understand the weight limits of your mounting system. This prevents failures and injuries. Professional installers know that skipping safety checks can lead to big problems.
The success of your project depends on wall thickness, anchor type, and load capacity. Different drywall thicknesses can handle different weights, even with the same anchors. For example, standard half-inch drywall supports less than five-eighths inch material.

Manufacturer specs give a baseline weight capacity under perfect lab conditions. These specs assume perfect installation and wall conditions. But, real-world conditions are rarely perfect.
Toggle bolts support 75-100 pounds per anchor in half-inch drywall. Molly bolts handle 25-50 pounds, depending on size and wall thickness. Snap toggles can support up to 265 pounds in thick drywall with proper installation.
Heavy duty anchors work differently based on load direction. Vertical loads are less stressful than horizontal pulling forces. Your cabinet installation must consider both weight and potential movement.
"The anchor is only as strong as the weakest point in the system - whether that's the drywall, the anchor itself, or the installation technique."
Professionals use safety factors of 2:1 or 3:1 over manufacturer ratings. This means your anchor system should support two to three times your cabinet's loaded weight. This approach prevents unexpected failures.
Progressive load testing checks anchor performance before installing the cabinet. Start with the cabinet's empty weight, then add items while watching for movement. Any shifting or creaking sounds mean the support is not enough.
Keep a record of your testing with photos and weight measurements. This record helps spot problems early and provides future reference points. Never skip the testing phase - it's your safety net.
Spotting mounting problems early prevents big failures. Regularly check your installation for signs of trouble. Small issues can turn into big disasters if ignored.
Drywall cracks around anchor points show too much stress. These small cracks often appear before a complete failure. Fix cracking by redistributing weight or adding support right away.
Cabinet sagging means anchor movement or wall damage. Even slight drooping is a sign of a problem. Check cabinet position monthly for the first year after installation.
Unusual sounds during loading are a warning of failure. Creaking, popping, or grinding noises mean stress beyond limits. Stop loading and check all connections when you hear these sounds.
Regular checks keep your cabinet installation safe over time. Inspect mounting hardware every quarter and after any big vibration or impact. Prevention is cheaper than fixing and replacing.
Drywall reinforcement makes weak walls strong enough to hold heavy cabinets. This is needed when regular anchors can't handle the weight. Wall reinforcement spreads the weight over a bigger area, making it more stable.
There are many ways to reinforce walls, each for different needs and wall types. The right method depends on the cabinet's weight, how easy it is to access the wall, and how long you want the support to last.
Backing boards are the best way to support heavy cabinets. You cut holes in the drywall to fit plywood or OSB panels behind the mounting area.
First, mark where the cabinet will go and cut a hole in the drywall. Make sure not to hit any wires or pipes. Then, place ¾-inch plywood between the studs, using adhesive and screws.
The plywood should go 6 inches beyond each mounting point. This makes a solid base for screws or bolts, avoiding the need for special anchors.
There are many ways to make drywall installation stronger without tearing down the wall. Adding horizontal blocking between studs helps spread the weight.
Metal plates can also be used. They attach to the drywall and spread the weight. Some have built-in mounting points for cabinets.
Special systems for cabinet installation offer top-notch structural support. They have expandable plates that fit behind the drywall through small holes.
| Reinforcement Method | Weight Capacity | Installation Time | Wall Damage |
|---|---|---|---|
| Plywood Backing Boards | 300+ pounds | 3-4 hours | Moderate cutting required |
| Metal Reinforcement Plates | 150-200 pounds | 1-2 hours | Minimal surface mounting |
| Horizontal Blocking | 250+ pounds | 4-5 hours | Extensive wall opening |
| Retrofit Backing Systems | 200-250 pounds | 2-3 hours | Small access holes only |
For heavy cabinets or valuable items, professional wall reinforcement is needed. Some places have building codes that require extra support.
Older homes or unique architectural features might need custom solutions. Professional help ensures the job is done right, even in tricky situations.
Think about the cost and effort of wall changes against the safety benefits. Professional reinforcement is often the best choice for heavy installations to avoid damage or injury.
Many cabinet installation failures come from simple mistakes. These mistakes can hurt the structure of your home. Knowing these errors can help you avoid expensive fixes and ensure your cabinets last long.
Experts say that installing cabinets without studs needs careful attention. Each step in the process is important. Skipping safety checks or using the wrong methods can cause big problems.
Choosing the wrong cabinet hardware is a common mistake. Many pick anchors based on price, not strength. This can lead to cabinets that can't hold the weight of dishes or supplies.
Using anchors that are too small can't handle the stress of daily use. Doors and drawers add extra stress. Experts say to use anchors that can handle at least double the expected load.
Another mistake is mixing different types of anchors. Each type works differently. Using both toggle bolts and molly bolts can cause uneven stress, making the cabinet unstable.
Putting too much weight on one spot can cause anchors to fail early. DIY installers often put anchors too close together. This makes each anchor carry too much stress.
Spreading anchors out properly helps each one handle its load better. Mounting without studs requires careful placement. Experts usually space anchors 16 inches apart.
How you load your cabinets also matters. Putting too much weight on one side can pull anchors out of the wall. Keeping the weight balanced prevents this.
Drilling too shallow prevents anchors from expanding properly. Drilling too deep can damage wiring or pipes. It's important to find the right depth.
Drilling at the wrong angle also weakens anchor grip. Holes that are perfectly straight ensure the best hold. Even a little bit off can reduce the anchor's strength by 30% or more.
The size of the pilot hole is also crucial. A hole that's too big or too small can mess up the anchor's performance. Each type of anchor needs a specific hole size for the best results.
| Common Mistake | Consequence | Prevention Method | Cost Impact |
|---|---|---|---|
| Undersized anchors | Cabinet collapse | Calculate load properly | High repair costs |
| Poor spacing | Uneven stress distribution | Follow manufacturer guidelines | Medium reinstallation |
| Wrong hole depth | Inadequate anchor expansion | Measure wall thickness | Low hardware replacement |
| Mixing anchor types | Inconsistent load sharing | Use uniform hardware | Medium stability issues |
Testing your cabinet installation is key to making sure it works right. It checks if your wall anchors can handle the weight safely. This step is vital to protect your investment and ensure it lasts long.
Testing involves several steps. Each step helps you feel confident in your installation and finds any weak spots early.
Start by testing with an empty cabinet. This checks if the brackets are secure and level. Look for any signs of movement or anchor shift.
Then, add weight in small amounts until it reaches normal capacity. Watch the anchors closely during each step. Stop if you see any signs of stress or movement.
Test at the maximum weight for 30 minutes. This long test shows any issues that might not be seen in short tests. Different anchors handle pressure differently, making this step very important for safety.
Do regular checks every three months for the first year. Look for cracks or damage around the anchors. Use a level to check if the cabinet is still straight.
Check if the mounting brackets or hardware are loose. Daily use can loosen them, which is bad for some anchors. Early detection prevents catastrophic failure.
Check the cabinet inside for stress or warping. Uneven weight can damage the structure. Fix any problems quickly to keep everything working right.
Retighten the mounting hardware every year or when it gets loose. Use the right tools to avoid damaging the anchors or drywall. Keep a log of when you make adjustments.
Replace worn-out parts before they break. Mounting brackets and hardware show wear signs. Keep spare parts ready for quick fixes.
Fix small alignment issues right away to avoid bigger problems. Small fixes are cheaper and easier than big repairs. Regular care makes your mounting system last longer.
Installing wall cabinets without studs is now easier with the right planning and quality hardware. This guide shows you how to succeed, from using basic toggle bolts to advanced mounting systems.
The type of drywall anchor you choose is crucial for safety and durability. Toggle bolts are great for heavy loads, while molly bolts are better for lighter items. Each anchor is designed for different weights and wall types.
Always prioritize safety during installation. Make sure to calculate the weight carefully to avoid accidents. Test the cabinet with light loads before adding heavy items.
Getting professional results means paying attention to every detail. Measure carefully, drill precise pilot holes, and mount securely. This ensures your cabinet stays in place for years.
With these techniques, you can now handle cabinet mounting projects that seemed hard before. The secret is to pick the right hardware and follow the installation steps carefully. Your new skills will open up many home improvement opportunities.
The weight a cabinet can hold varies by anchor type and how well it's installed. Toggle bolts can hold up to 75 pounds each. This means a cabinet up to 150 pounds can be supported with multiple anchors. Molly bolts support up to 50 pounds each.
For cabinets over 200 pounds, consider using French cleat systems or adding drywall reinforcement.
Yes, you can hang cabinets on drywall without studs. Use heavy-duty anchors like toggle bolts or snap toggle systems. Make sure to calculate the total weight of the cabinet and its contents.
Use the right anchor spacing for even weight distribution. Always add a safety margin of 2:1 or 3:1 for long-term stability.
You'll need a good drill, a stud finder, a level, and a measuring tape. Also, a pencil for marking, safety glasses, a dust mask, and work gloves are essential. Choose the right mounting hardware based on your cabinet's weight and the wall's condition.
Choose anchors based on your cabinet's weight and the wall's thickness. Toggle bolts are best for heavy cabinets (75+ pounds). Molly bolts work for medium-weight (25-50 pounds) and allow for easy removal. Snap toggle systems are good for moderate loads and are easy to install.
Always check the wall's thickness and the anchor's compatibility before buying.
Anchor spacing should evenly distribute the weight. Use 4-6 anchors per cabinet, depending on size and weight. Space them 16-24 inches apart horizontally.
Ensure they align with the cabinet's mounting rails. Avoid clustering anchors too closely, as this can weaken the drywall.
Standard 1/2-inch to 5/8-inch drywall can support cabinets with the right anchors and installation. Use a stud finder or small probe hole to test the wall's thickness.
Check for damage, ensure the wall is plumb and level, and verify there are no hidden utilities. If the drywall feels soft or damaged, consider reinforcement before installation.
Warning signs include visible anchor movement and drywall cracking around anchor points. Also, look for cabinet sagging, gaps between the cabinet and wall, and unusual creaking sounds when loading.
If you notice any of these signs, remove items from the cabinet and assess the installation.
Removal depends on the anchor type. Molly bolts can be loosened and retightened multiple times without losing holding power. Toggle bolts, on the other hand, cannot be reused once removed.
French cleat systems allow easy cabinet removal and reinstallation without affecting the mounting hardware.
Perform progressive load testing by gradually adding weight while monitoring for movement or stress signs. Start with the empty cabinet weight, progress to normal loaded conditions, and test up to maximum anticipated load.
Check anchor points, cabinet alignment, and listen for unusual sounds. Conduct periodic inspections to ensure continued stability over time.
Consider professional installation for cabinets weighing over 200 pounds. Also, if local building codes require enhanced support systems, or if you're uncomfortable with power tools or working at height.
When wall reinforcement is needed, or when mounting extremely valuable items. Professional installers have specialized tools and experience to handle challenging installations safely.
Always wear safety glasses and dust masks when drilling. Use proper ladder safety techniques and ensure adequate lighting in the work area.
Check for electrical wires or plumbing before drilling, apply conservative load calculations with safety margins, and have someone assist with lifting and positioning heavy cabinets. Never exceed manufacturer weight ratings for anchors.
Properly installed wall anchor systems can last 10-20 years or more with normal use and periodic maintenance. Longevity depends on anchor quality, installation technique, load conditions, and environmental factors.
Regular inspection and maintenance, including retightening hardware and checking for wear, helps ensure continued safe operation throughout the system's service life.

Share:
How to Fix Kitchen Cabinets: Essential Repair Guide
How to Hide Under Cabinet Lighting Wires - Installation Guide